How to Find Out What Was Uploaded Original on Google Photos
It's important to know how to upload to Google Photos, especially if yous take lots of photos on your phone. Subsequently all, you don't want to lose all your precious pictures if your device is lost, stolen or broken.
The Google Photos app should support all your photos and videos automatically, but information technology doesn't always happen. Perhaps your phone is ready to only upload content when yous're connected to Wi-Fi, or the app isn't syncing the right folders.
- How to utilize Google Photos
- Learn how to delete Google Search history
- Find out how to Google interpret a website
- Here's how to check Google storage usage
Fortunately, information technology'southward very piece of cake to upload to Google Photos manually, both on your mobile device and on your desktop figurer. Yous tin also ensure that the service automatically backs up photos and videos in future, and at the quality of your choice.
In this guide we'll explain the easiest means to upload to Google Photos wherever you are.
How to upload to Google Photos: From your phone
Provided you take "Back up & sync" switched on, the Google Photos app on your Android or iOS telephone or tablet should automatically upload your photos and videos to the cloud. But you tin likewise upload them manually. Here'due south how.
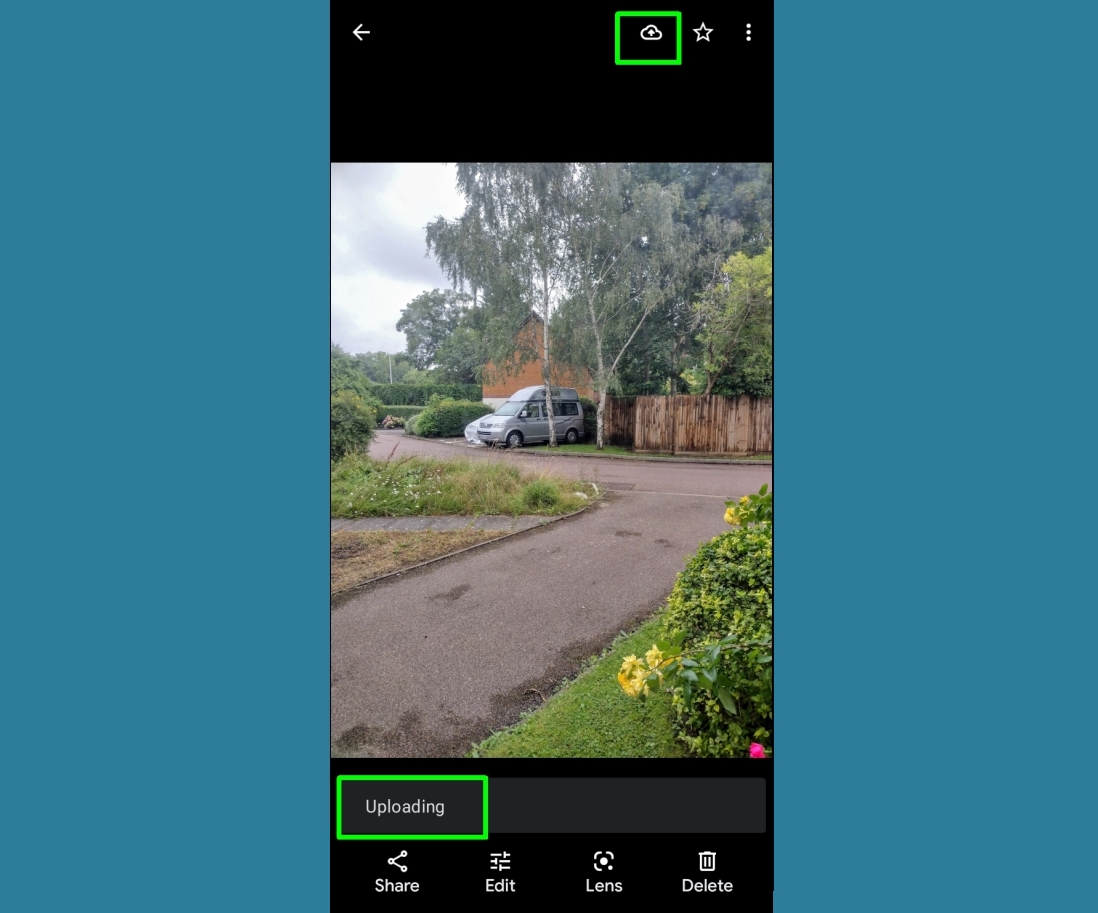
1. Open up the Google Photos app on your phone or tablet and select a photograph or video that you want to upload.
Tap the cloud icon in the elevation-right corner of the app. You should run across a message at the bottom of the screen that says "Uploading."
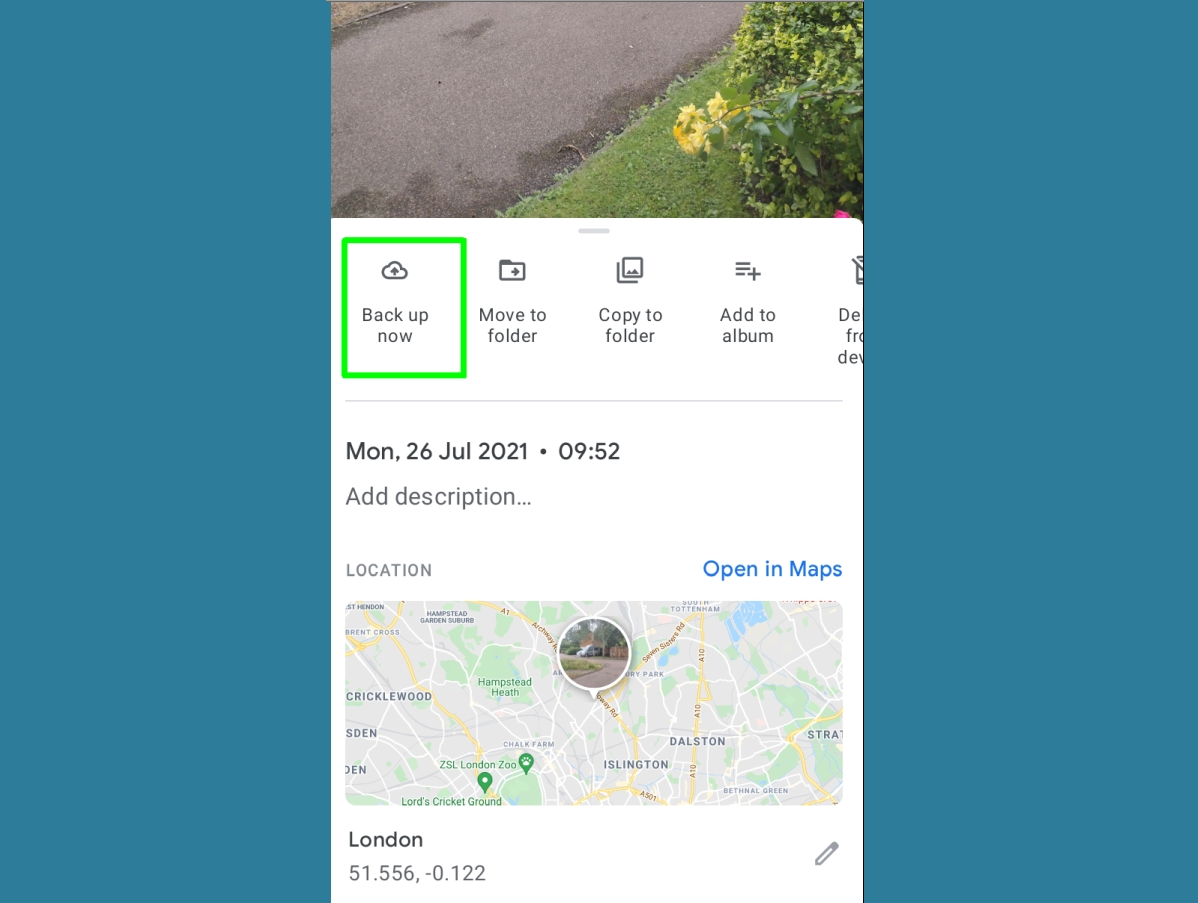
2. If you don't come across the cloud icon, tap the 3-line button in the top-correct corner of the app. Cull "Back upward now" to upload the photo or video to Google Photos.
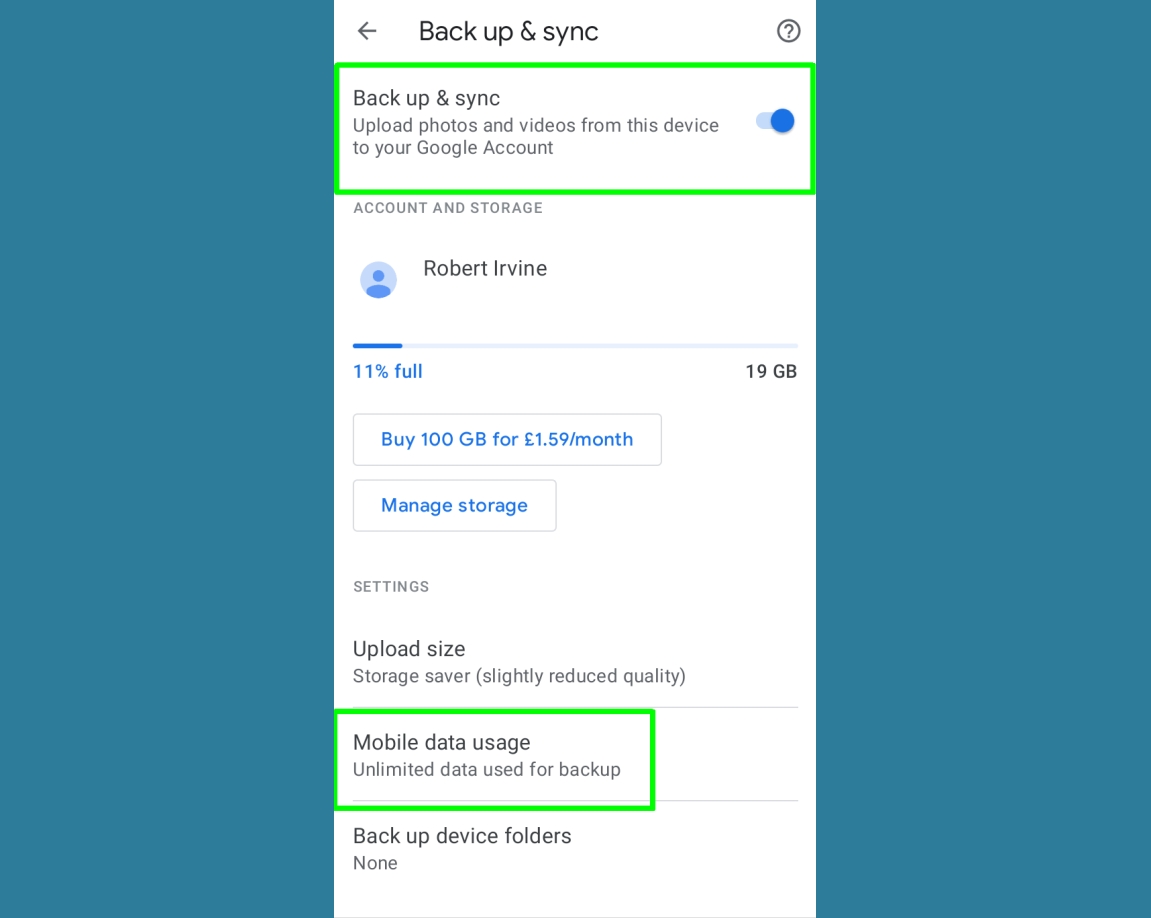
3. To ensure that your photos and videos upload to Google Photos automatically, tap your profile pic in the top-right corner of the app and select "Photos settings."
Switch on "Back upwards & sync" if it's turned off. If you're worried most exceeding your monthly data usage limit, tap "Mobile information usage" at the bottom of the screen and set a daily limit for backups, from 5MB to Unlimited.
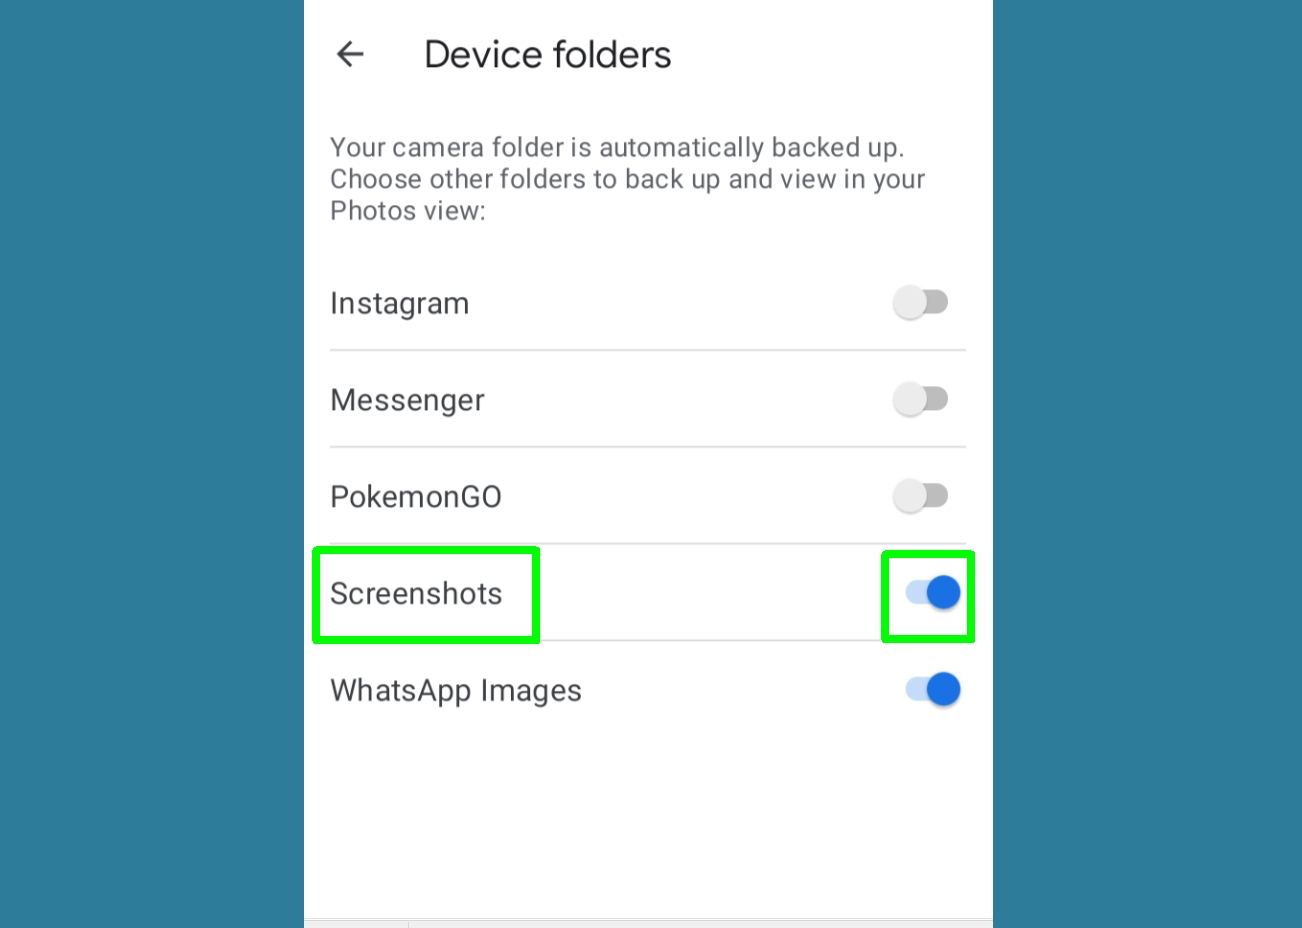
4. Google Photos volition automatically upload the contents of your Camera folder, but yous can make it back up other folders, besides. Tap "Support device folders" and cull which folders you want to sync, such equally Screenshots and WhatsApp Images.
5. To set Google Photos to simply upload your photos and videos when yous're connected to Wi-Fi, switch off "Support & sync," and then go back to your account screen and tap "Turn on fill-in."

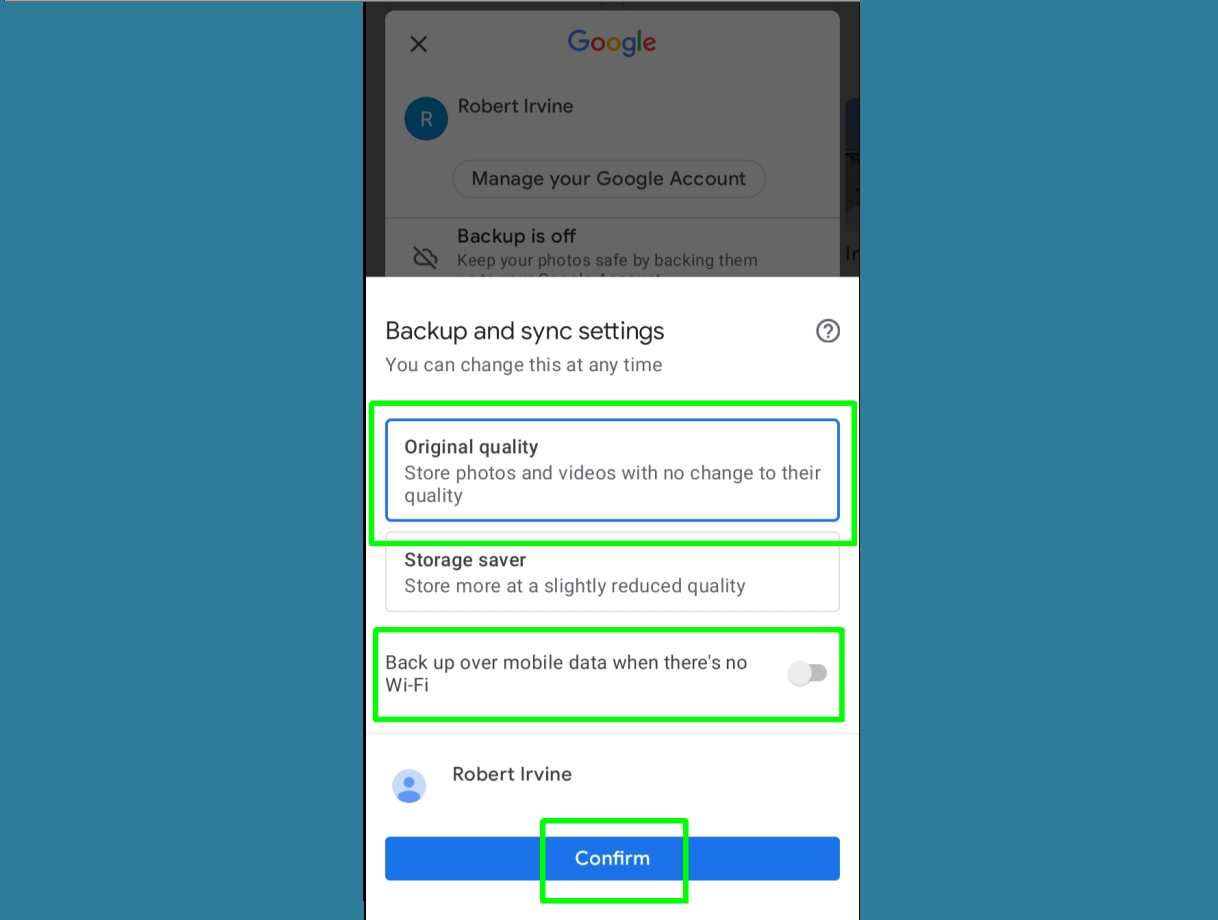
6. Switch off the option "Back up over mobile data when there's no Wi-Fi."
To improve the quality of your uploads, change from the default of "Storage saver" (which reduces their quality just uses less of your storage limit) to "Original quality." Tap Ostend to save these changes.
How to upload to Google Photos: From your desktop
Yous tin can upload private photos and videos, or whole batches of them, to Google Photos from your desktop. Here are the easiest means to do so through your web browser and by using "Backup and sync."
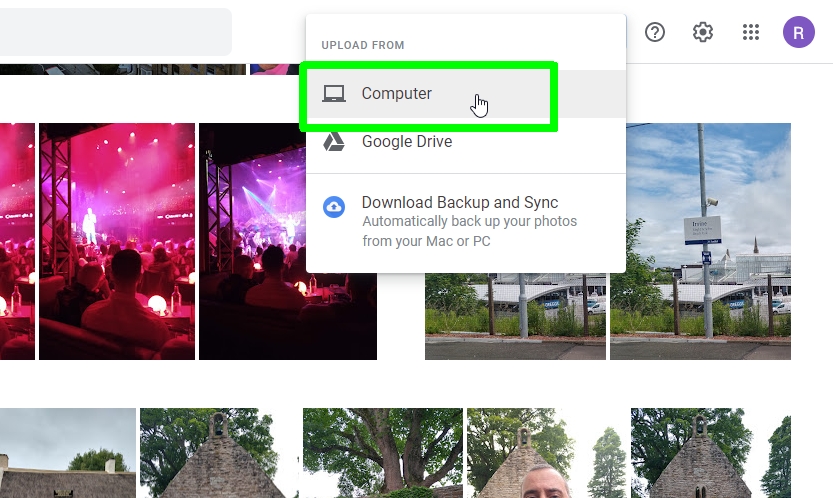
1. Visit the Google Photos website (opens in new tab)in your browser. Click the Upload button in the top-right corner of the Photos page and cull Computer.
When the Open box opens, select the photo or video you want to upload and click Open up. To upload multiple files, either hold down Ctrl while you click them, or select them with your mouse.
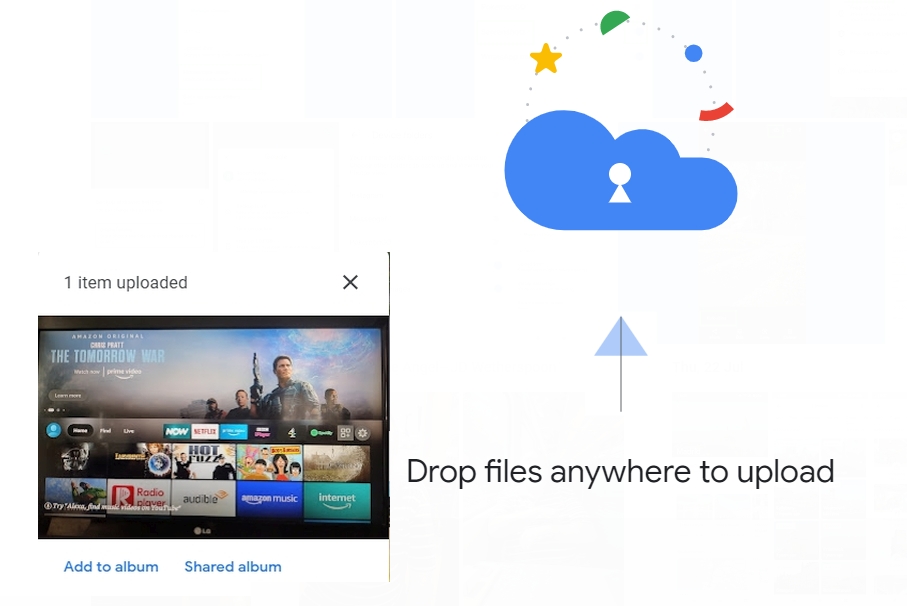
2. Alternatively, you can just drag and drib photos and videos from your desktop into Google Photos in your browser. Yous'll come across a pop-up confirming that items take been uploaded in the lesser-left corner of the window.
To add photos and videos to a specific anthology, yous can either select an anthology when y'all upload them, or click Albums and select an anthology in that location. Click the "Add photos" button in the top-correct corner and choose "Select from computer."
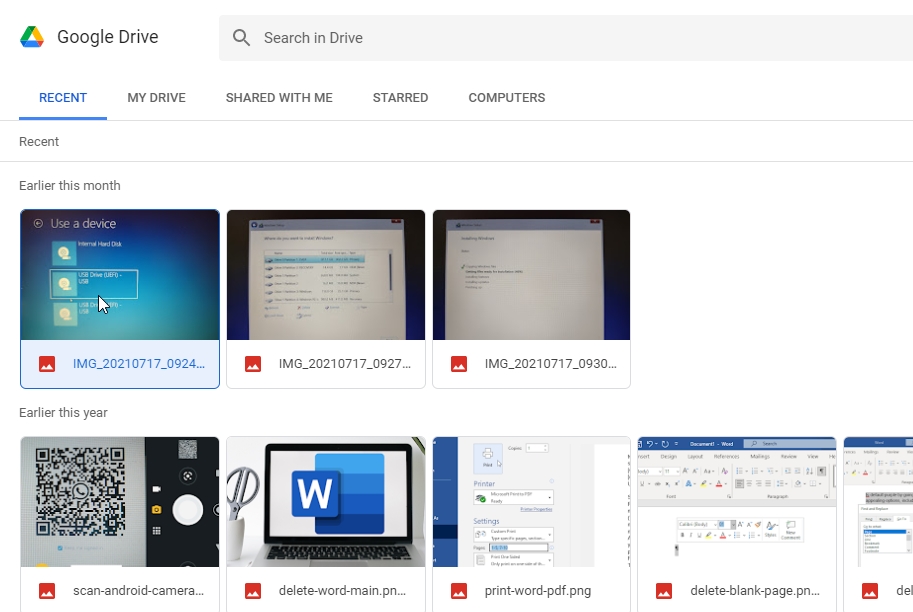
3. Y'all can also import photos and videos from Google Drive by choosing that option in the Upload bill of fare. This will open a Google Drive window where y'all can select the files to upload to Google Photos.
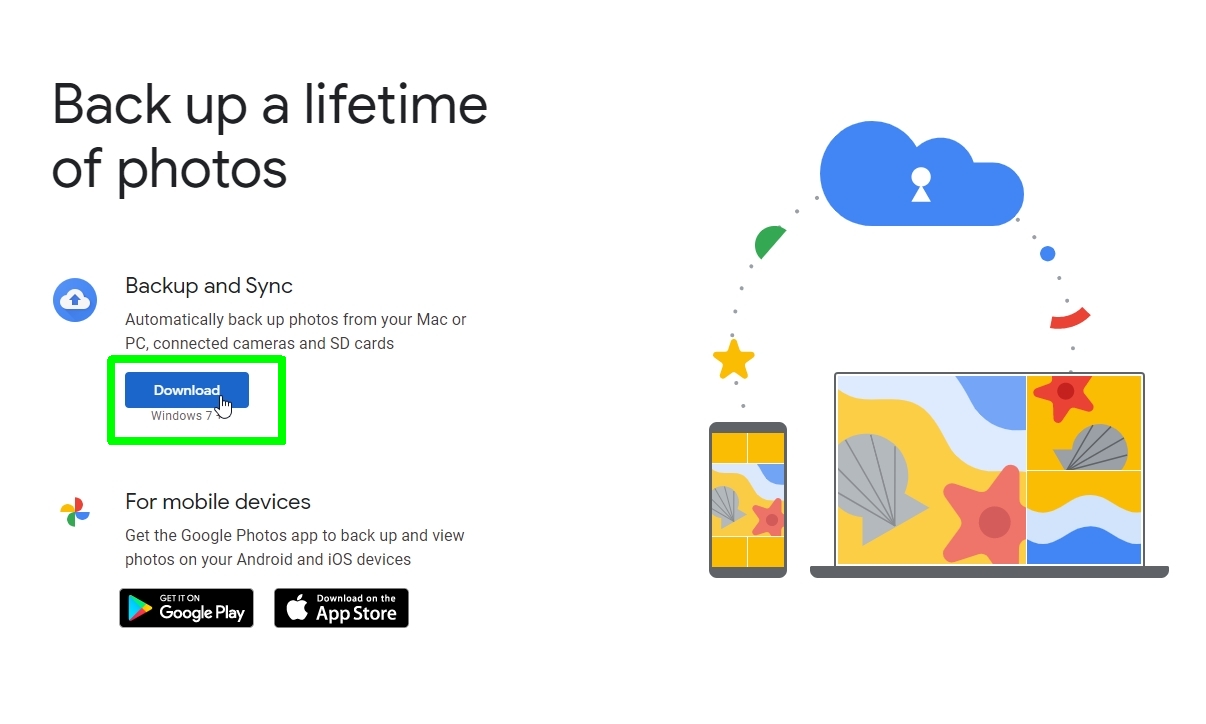
iv. To salvage you having to upload photos and videos to Google Drive manually, select "Download Backup and sync" in the Upload card and download the free app to your PC or Mac.
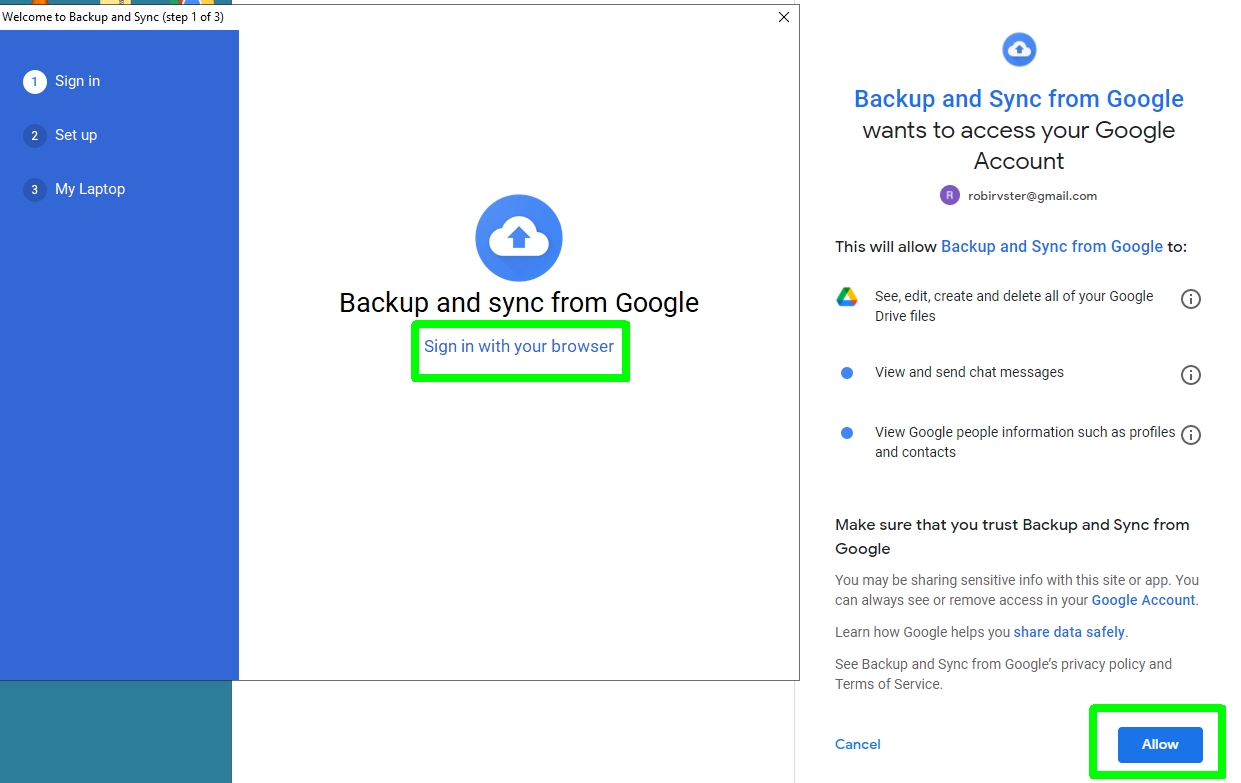
5. Once downloaded, install and open the "Backup and sync" app. Click "Get Started", then cull "Sign in with your browser."
Click Allow to grant the app access to your Google account.
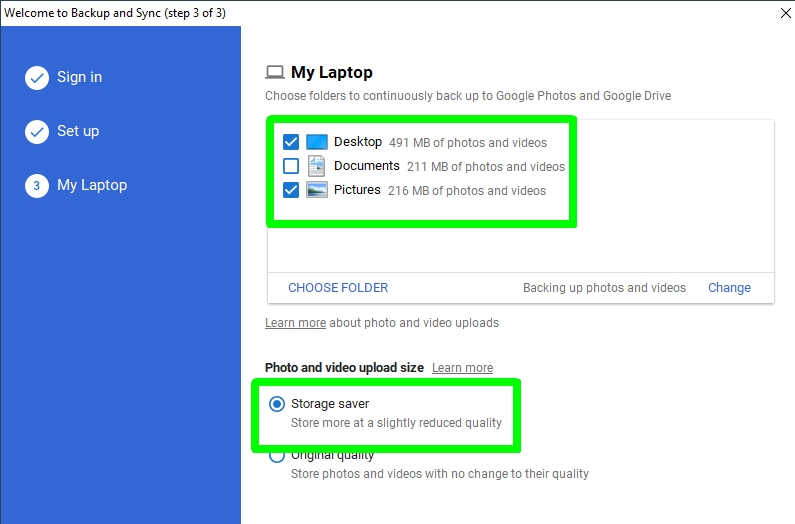
six. Back in the "Fill-in and sync" app, select "Back up photos and videos," then click Next. Cull the folders on your computer that you desire to automatically back up to and sync with Google Photos.
Specify whether to keep photos and videos at their original size, or choose "Storage saver" to reduce their resolution and salvage space.
Finally, click Start to begin uploading the contents of the selected folders to Google Photos. This will happen automatically in future when you add new items to these folders.
For more Google Photos tips and tricks cheek out our guides on how to hibernate photos and videos in Google Photos, how to blur the background in Google Photos and how to upload to Google Photos.
Source: https://www.tomsguide.com/how-to/how-to-upload-to-google-photos
0 Response to "How to Find Out What Was Uploaded Original on Google Photos"
Post a Comment